-
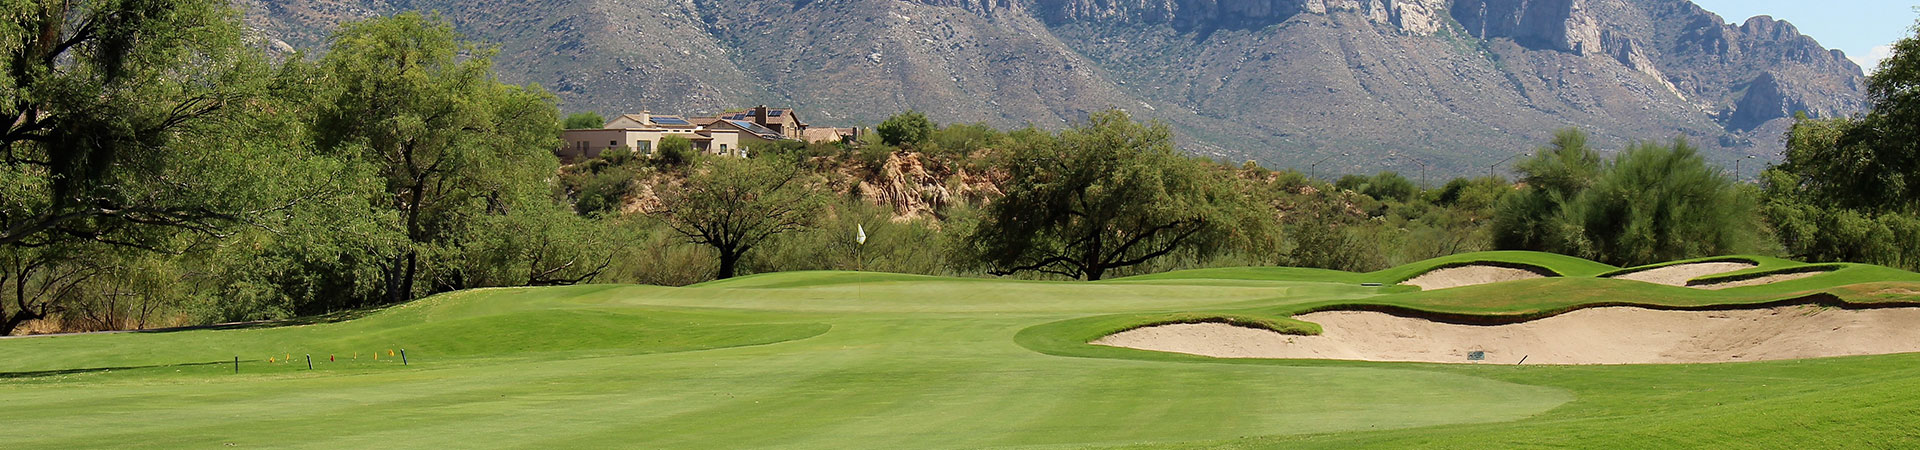
Hole #1
Par 4, 373 yards
Take a moment to enjoy the spectacular view of the Santa Catalina Mountains from this elevated tee box. The driver is optional on this hole for the long hitters. Favor the left center of this fairway for a good look at the green, an accurate tee shot is a must. Green slopes back to front, so an approach shot to the center of the green is good. -

Hole #2
Par 5, 519 yards
Bunkers on the left come into play for wayward tee shots. Mounds on left and right tend to kick your ball back toward the fairway. Lay up shot should be over the right edge of the corner bunker to avoid going through the fairway and into the desert on the right. (Those going for the green in two will have to cut more of the corner). This leaves a short iron to a small, elevated green that slopes significantly from back to front and left to right. Over the green (long) is not an option on this hole. -
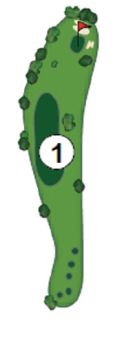
Hole #3
Par 3, 171 yards
Don’t let this seemingly short par 3 fool you. Depending on wind direction and pin position, club selection could vary as much as two clubs. The green is well guarded with bunkers and has a hollow in the front left that can make two-putting difficult. -
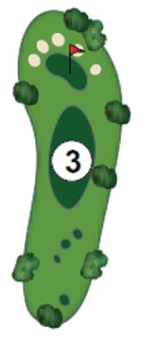
Hole #4
Par 4, 441 yards
Favor left center of the fairway. Rough with hollows and a depression divide the fairway in two, 165 to 130 yards from the green. Tee shots running through the first fairway could leave an awkward lie. Fire for the center of the green–right is guarded with bunkers; left side drops off sharply. -
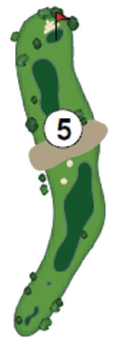
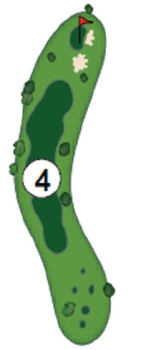
Hole #5
Par 5, 500 yards
Aim tee shot down left center of fairway, short of the wash. Green is reachable in two with fairway wood or long iron but laying up may be a smarter play depending on pin position. This leaves a short iron to undulating green that is shallow and wide. Avoid bunkers behind and in front of green; drop off on the back right portion of green. -
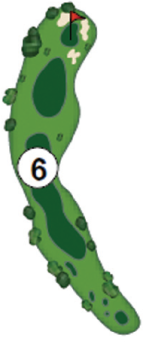
Hole #6
Par 4, 416 yards
This dog-leg right requires a tee shot to the left center of the fairway. (Lots of trouble on the right side). Bowl shaped green with right front bunker and bunkers in back of green. -
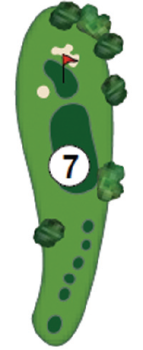
Hole #7
Par 3, 187 yards
Breathtaking views of Catalina Mountains from the elevated tee on this signature hole. Prevailing wind makes this hole play half to one club shorter. Center of green is a smart play. Being long is not an option and avoiding the deep-faced bunker on the left is a must! -

Hole #8
Par 4, 391 yards
Narrow chute opens up to a generous fairway off the tee. Right center is ideal, leaving a perfect angle to the slightly elevated green that narrows from front to back. -
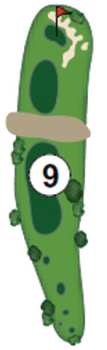
Hole #9
Par 4, 399 yards
This hole can bite you if you’re not careful! Fairway ends 10 yards beyond the 150 yard pole. There is a 30 foot drop off into a water hazard you can’t see from the tee. Laying up short is an absolute must! With second shot take enough club to clear front of the green. Left side of hole slopes off severely. (Out of bounds left of the cart path.) Bunkers protect right and back sides of the green. -

Hole #10
Par 4, 408 yards
A 90-degree dog-leg left with bunkers guarding the left side of the fairway. Long hitters can carry these bunkers, but a safer play is to aim straight ahead at the bunker on the right of the fairway. Use a short iron to a very receptive green with a right side bunker. -

Hole #11
Par 5, 505 yards
Reachable in two! Tee shot should favor right side of the fairway. If you choose to lay up with your second shot, a shot just past the 150 marker is ideal. Watch for the left side fairway bunker 100 yards in front of green. Bail-out fairway on right for your lay up shot. Green is long and narrow. -
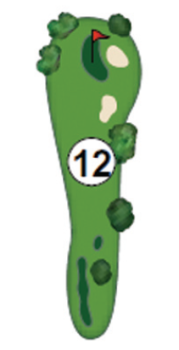
Hole #12
Par 3, 200 yards
This long par 3 can be made even longer with a little wind and the size of the green. Anything hit right bounces off a slope into a large greenside bunker with trees. Favor the left side and save your par. -
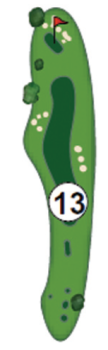
Hole #13
Par 4, 387 yards
Straight away par 4! Fairway bunkers on left and right are reachable with a wayward tee shot. Approximately 75 yards from the green there is a yellow staked hazard not visible from the tee box. Getting the ball on the correct level of the green is very advantageous. -

Hole #14
Par 4, 440 yards
This hole requires a good tee shot just over the right side of the trees. Favoring the left side of this fairway will leave you a better angle to the green. However, there is a large fairway bunker on the left that is not visible from the tee. A tree guards the right side of the green and bunkers guard the left front. -

Hole #15
Par 4, 360 yards
Don’t be fooled by this short par 4! Keep your driver in the bag! A fairway wood or long iron is plenty for this tee shot. Aim just right of the 150 marker and this will leave you a short iron to the green. Fair-way runs out inside the 100 marker. Approach shot MUST avoid the bunker on the left. Green is small and elevated while well guarded with bunkers to the right and back. -

Hole #16
Par 5, 512 yards
A big tee shot over the left corner is ideal-everything will kick right off the mounds. Too far right and you may be in the desert. Lay up shot is wide open to 100 yards. Approach shot is to a deep three-tiered green. Bunkers on the right come into play for those attempting to reach the green in two. Little room behind the green, don’t go long! Bunkers guard right side of green. -
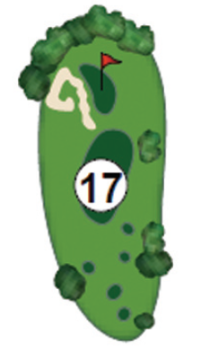
Hole #17
Par 3, 157 yards
Club selection is critical on this tricky par 3. Hole tends to play half to one club shorter depending on the prevailing wind. Center of this green is a good, safe shot. Shots beyond the hole and too far left will leave tough downhill breaking putts for birdie. -
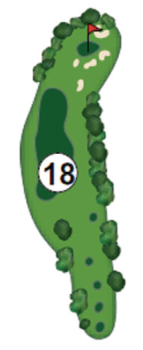
Hole #18
Par 4, 349 yards
No need for driver on this hole. A fairway wood or long iron towards the bunker at the end of the fairway finds you in 100 yards or less. Lateral water hazard comes into play for tee shots too far right. Approach shot is to an undulating green guarded by bunkers on all sides.